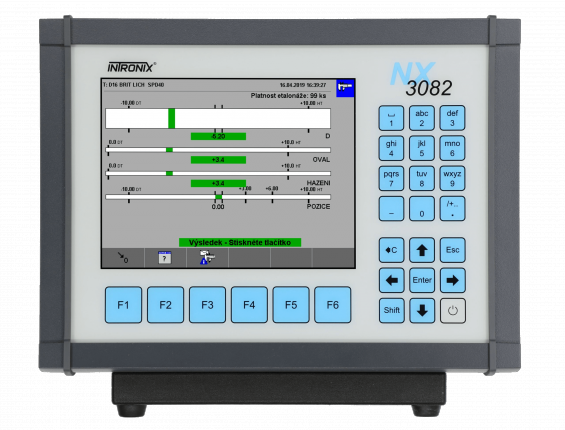
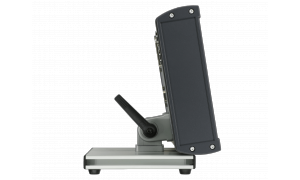
NX3082
MEASURING AND CONTROL UNIT
- Fast measurement
- Comfortable display
- Easy control
- Completely user-configurable
- Compact
- Expandable
It is the main representative of a number of compact intelligent devices for workplaces that measure geometric values. The basic areas of application of the device are measuring stations with manual or automatic operation, but it can also be used for laboratory measurements.
Easy integration of the device into measuring workplaces, machinery control systems and quality management systems.
Larger number and range of measuring channels than what is usual in devices in this category – the device can be fitted with up to 8 measuring channels for inductive sensors and 2 measuring channels for incremental encoders and can be expanded with external modules (e.g. for processing other inductive sensors or pneumatic signals). Also significant is the possibility to fit the device with a large number of different binary I/O channels directly in the basic design and also the possibility to use external modules, which allows use for more complex tasks such as measuring multiple parameters with dynamic evaluation or sequential measurement, or to connect several measuring jigs to one device.
Easy and clear operation via menus and function keys. It features a 6.5” high-brightness LCD display, with a long-life capacitive keyboard with built-in external interference suppression used to operate the front panel.
The advantage is the customer can directly and completely configure the measuring unit, from the number of measured parameters to their settings and assignment of measuring sensors to the configuration and assignment of binary inputs and outputs.
Number of measuring channels:
1–8 for inductive sensors, 0–2 for incremental encoders
Sensor type:
LVDT inductive differential sensor – half-bridge
linear incremental encoder, 5V power supply
possibility to connect other types of sensors – strain-gauge, pneumatic, etc.
Measuring channel parameters:
inductive sensor – standard range of ± 2 mm, 0.1 μm resolution at more than 1500 measurements/s
incremental encoder – range according to the encoder, max. frequency of the input signal 10 MHz
Binary inputs and outputs:
galv. isolated 2×4 OUT 24V / 0.7A, 11 IN 24V PNP.
Directly connectable to PLC
Display:
colour LCD TFT 6.4” 640x480 pixels
Connectivity:
1 USB host for connecting a USB FLASH disk
1 USB device for connection to a PC
optional port for Profibus DP connection
Ethernet RJ45 connection
Serial port – configurable RS-232, RS-485 or current loop 20 mA
Other:
Real time clock backed up by Li battery
SD card for data storage
Keyboard: capacitive membrane – 27 keys
Power supply:
24 V DC / max. 0.5 A
Dimensions, weight:
255 x 185 x 58 mm (without connectors), 2 kg
The measuring unit comes with a standard measuring programme that is suitable for most measuring tasks.
Main features of the measuring programme:
Selection of the number of measured parameters
- Entering a formula for calculation, e.g. S1 + S2
- Choice of method of evaluation and filtering of the measured course
- Possibility to use different types of sensors (inductive, incremental, pneumatic, etc.)
- Entering and editing an unlimited number of dimension types
- Automatic/manual start of measurement
- Configuration and assignment of input and output I/O signals
- Entering additional measurement data, such as order, operator, measures, etc.
- Multi-level password system
- Measured values shown in a graph
Typical tasks:
- SPC measurement including monitoring of measuring interval, display of control charts, Cp, Cpk, process check, measures selection, etc.
- Data collection unit, e.g. SPC measurement with complete export and the possibility of remote network configuration
- Control gauge
- Postprocess measurement
The PLC scan does not take more than 1 ms even for difficult tasks – the unit can also be used for more demanding control of dynamic tasks.
It is also possible to deliver a tailor-made programme for a specific application, e.g. special signal evaluation, atypical display of results, etc.
Katalogový list
nx3082-v1-2.pdf
Technické výkresy
nx3082-bocni-pohled.pdf
nx3082-celni-pohled.pdf
nx3082-nahled.pdf
nx3082-pohled-ze-zadu.pdf
nx3082-rozpis-konektoru.pdf


